- Editing: your favorite IDE
- Versioning: your favorite versioning tool (git, svn, mercurial, etc.)
- Editing: use the Layout Editor mode to intuitively manage your layout (UI)
- Versioning: use Forest CLI to manage your layout versions
Environments
Deploying to production
Forest is meant to help you manage your operations: this can only happen if your team operates on your Production data. To do so, you need to create your Production Environment. Click “Deploy to production” on the top banner or in the “Environments” tab of your Project settings.Deploy your Back-end
In the first step, you need to input your Back-end’s URL. This is the URL of the server onto which you have deployed (or will soon deploy) your Back-end’s codebase.Connect to your database
In the next step, you need to fill out your Production database credentials.Your database credentials never leave your browser and are solely used to generate environment variables on the next step, so they are never exposed.
Set your environment variables
The final step requires that you add environment variables to your server. Follow the on-screen instructions. Once your server is successfully detected and running with the indicated environment variables, a “Finish” button will appear.Creating a remote environment
Now that your back-office is live in production, you might want to add an extra step for testing purposes. Forest lets you create Remote Environments (for test, qa, staging, pre-production, etc.). To create a new Remote Environment, go to your Project settings, then from the “Environments” tab, click on “Add a new environment”.Change environment origin
Change the origins of your Environments to create complex workflows, for instance,dev > staging > preprod > production. All the layouts of an environment will be generated based on its parent’s layout.
Set an environment as production
To set another Environment as your Production Environment (also known as “reference”), click on the Environment you wish to set as production, and from its details page, click “Set as production”.To set an Environment as production it should have the actual reference as its origin.
Delete an environment
You may also delete an Environment. Be very careful as there is no going back.Branches
What is a layout?
A layout is all the configuration that defines your user interface (UI). In Forest, there is 1 layout per environment and per team.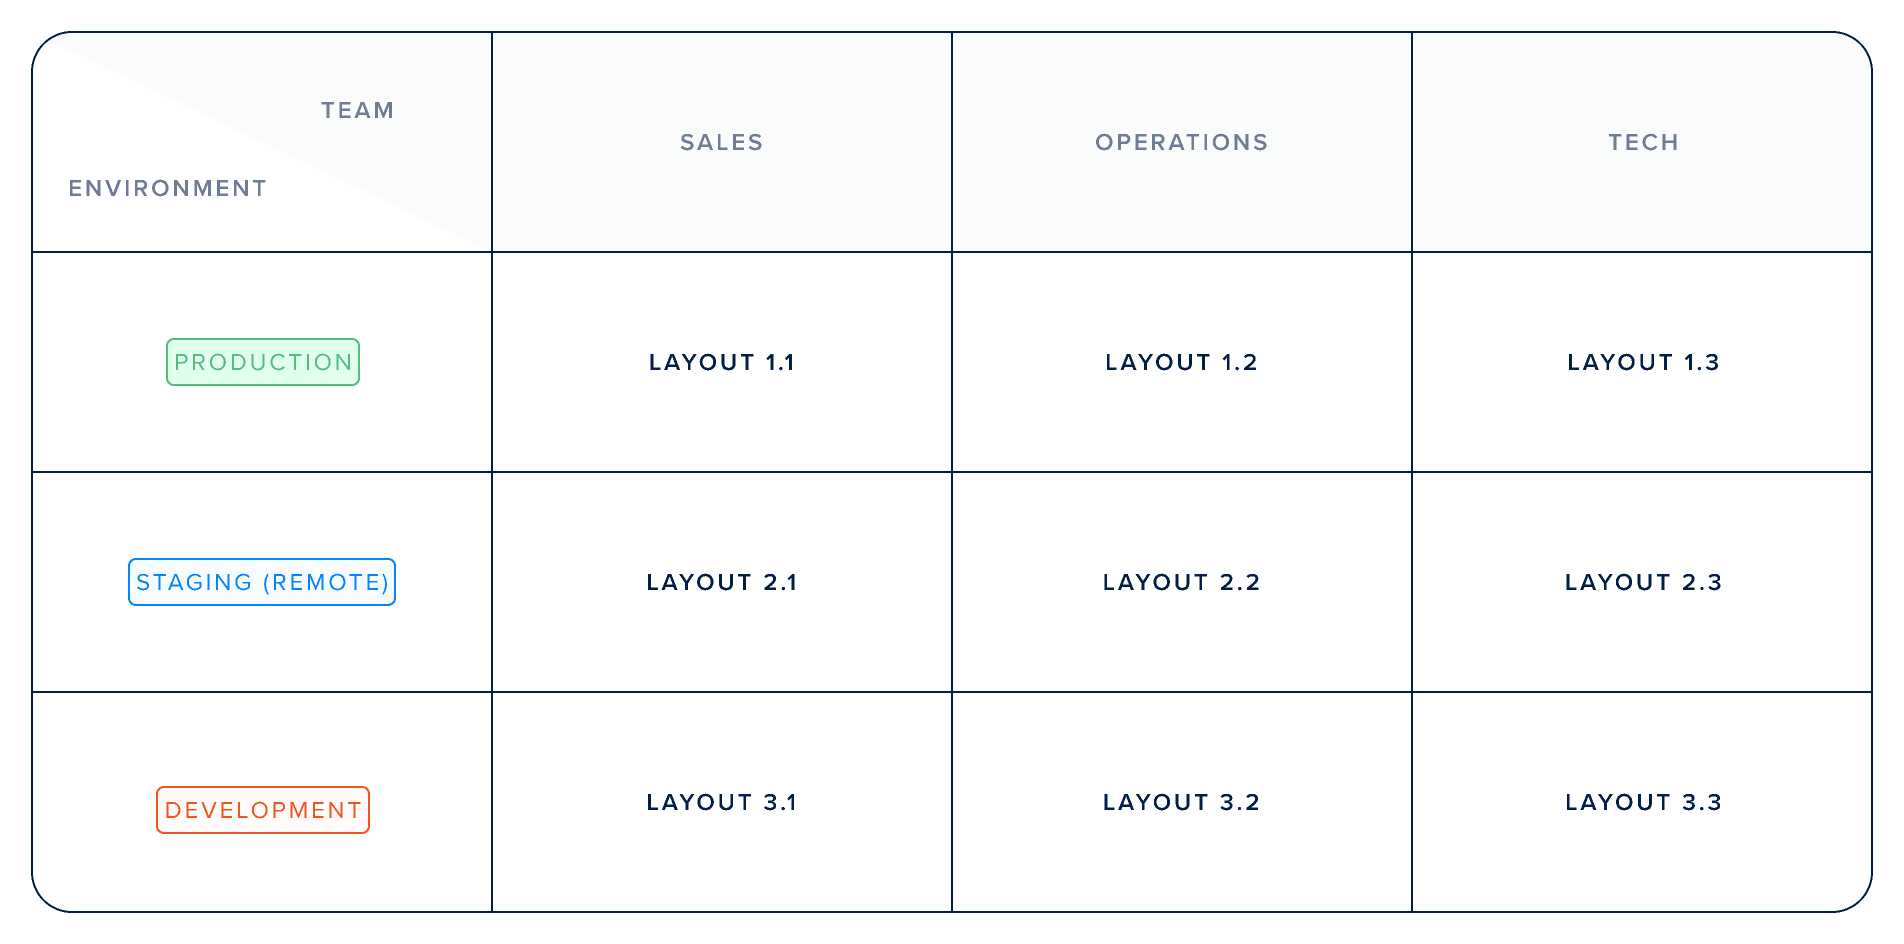
One layout per environment per team
What is a branch?
A Branch is a fork (i.e. copy) of the layout of the Environment it is attached to. A Branch can only be created in your own Development Environment.
A branch is a copy of its origin environment's layout
The origin of a branch is either specified using the
--origin option or selected when prompted. You should choose the environment you want to make some layout changes on.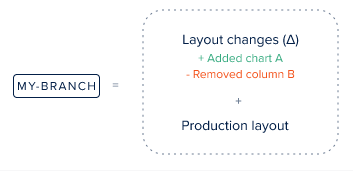
A branch and its origin environment side by side
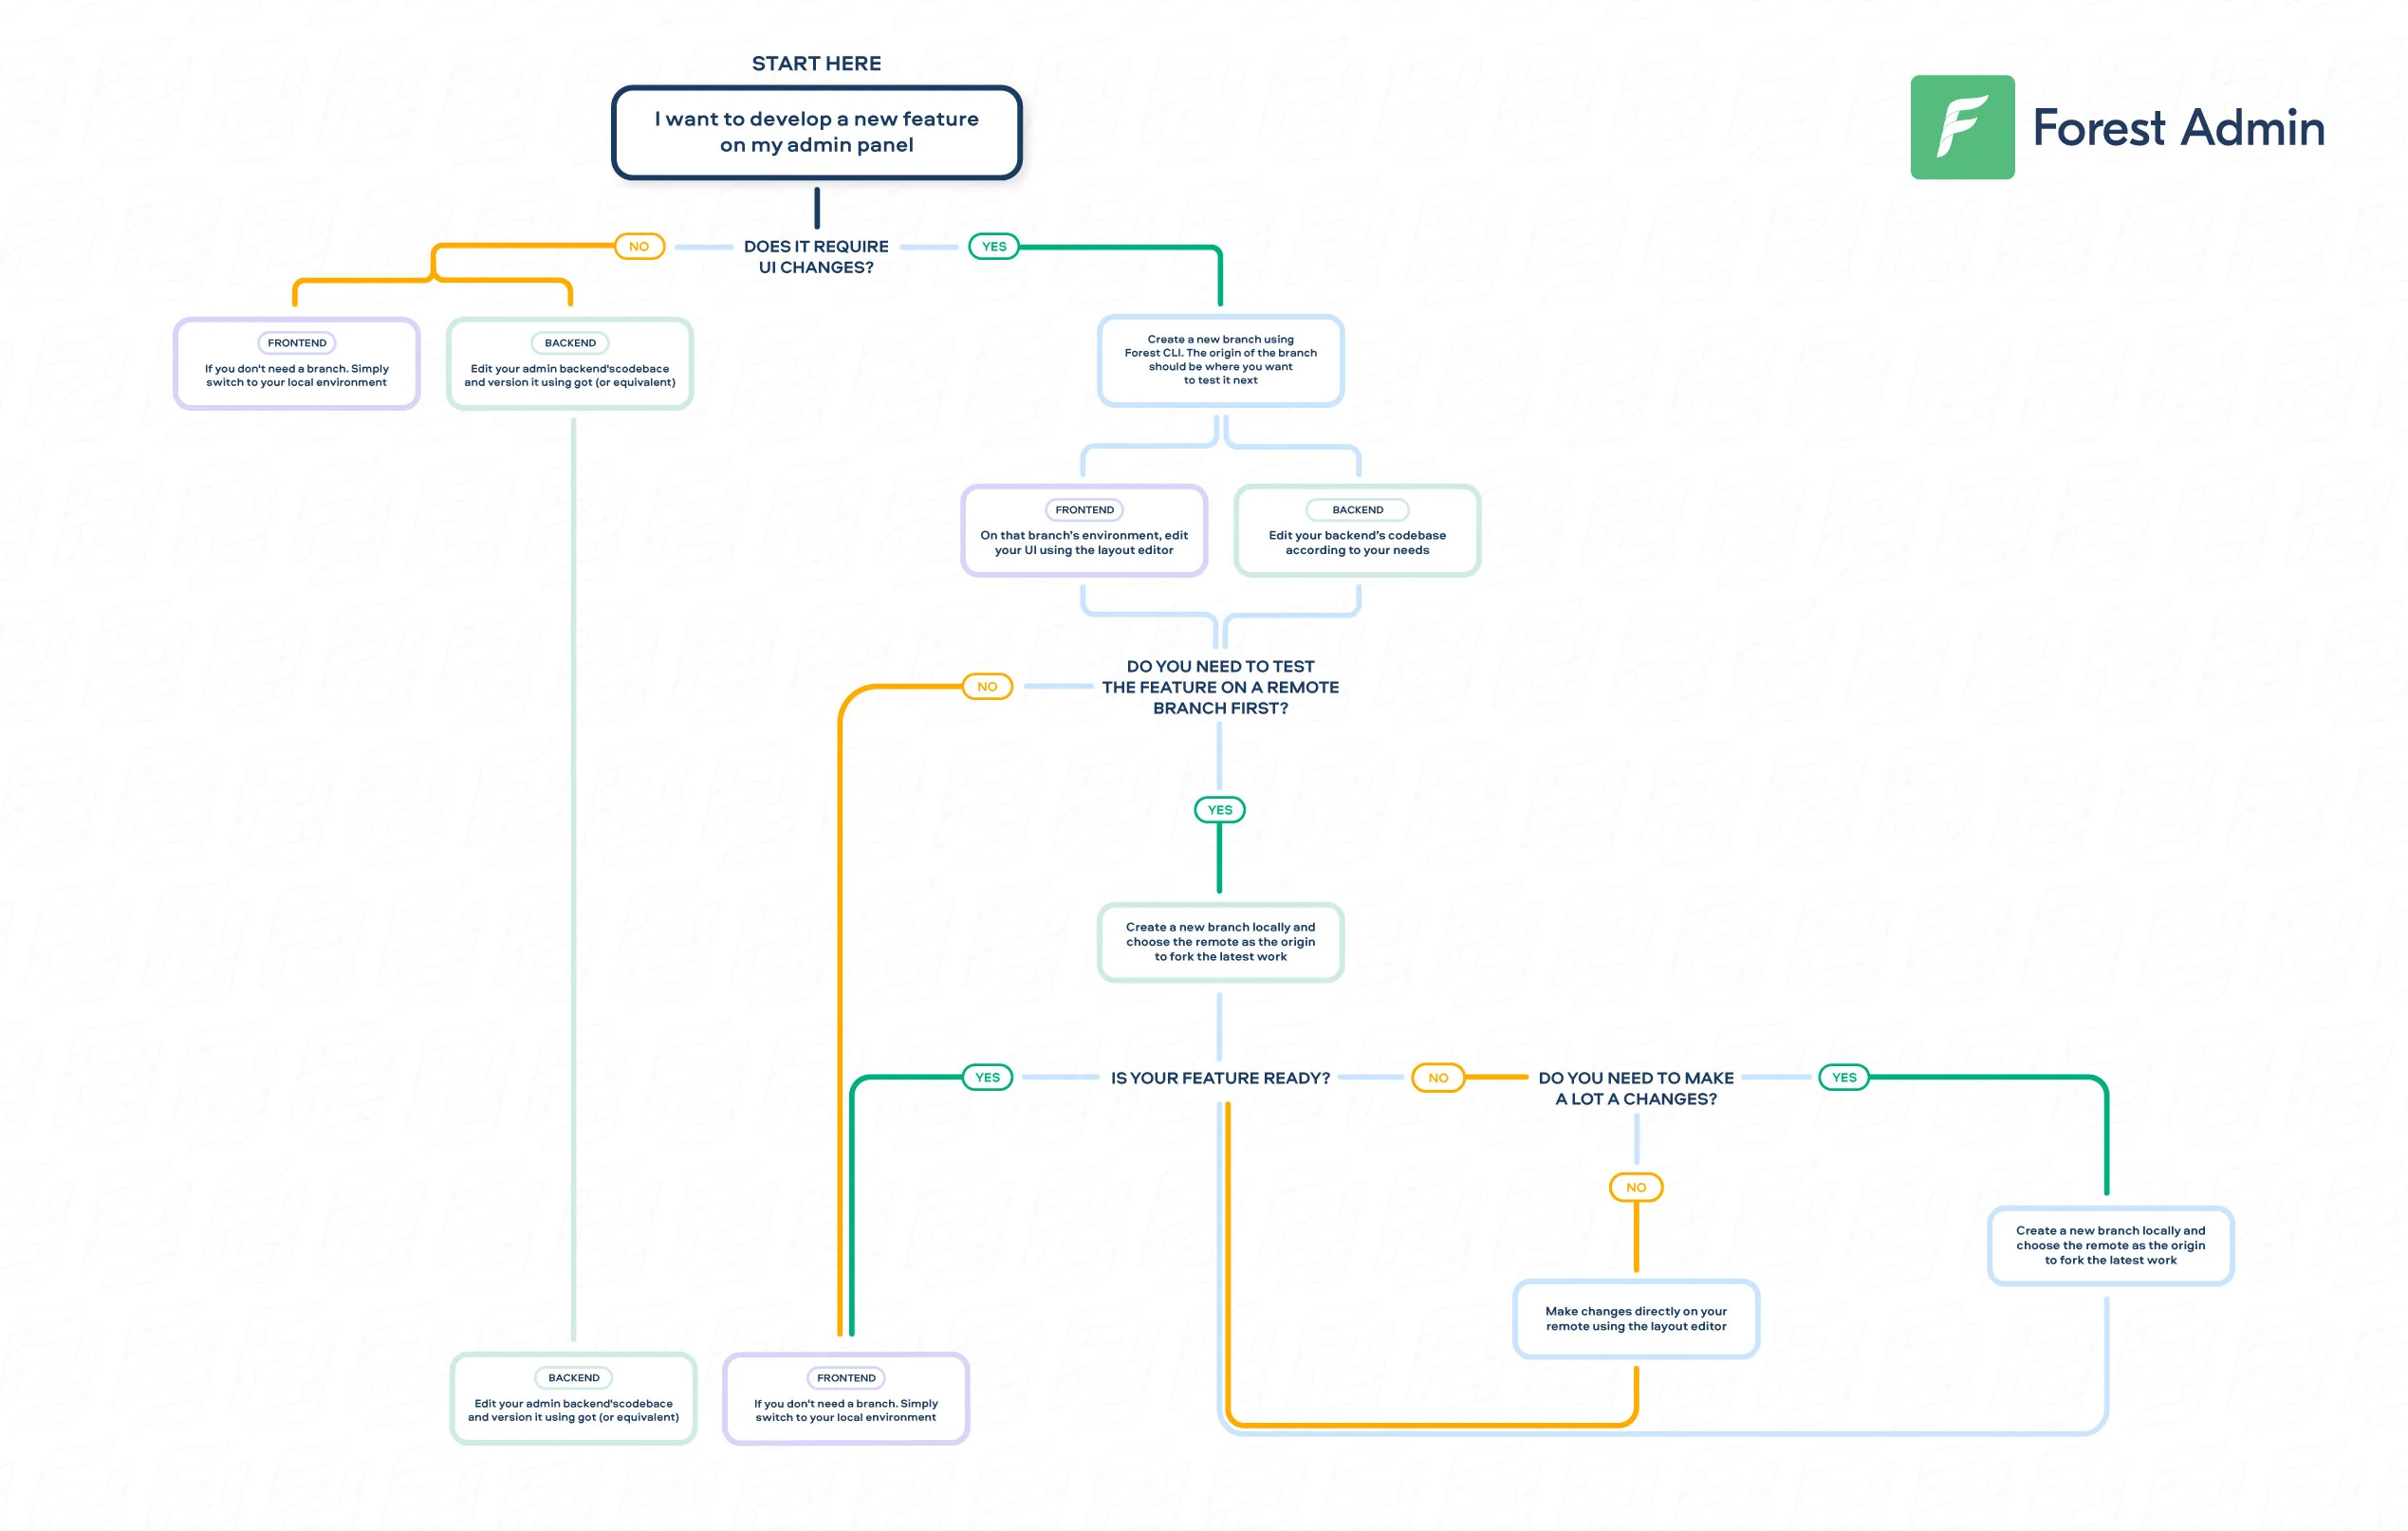
How do branches work?
Any layout change you make on your current Branch using the Layout Editor will be saved on your current Branch and will not affect its origin Environment.How do you create a branch?
To create a branch, use Forest CLI. Make sure you’ve created your local Development Environment using theinit command. Then, to create a Branch named my-branch based on your production Environment:
Using kebab-case is recommended. However, if you prefer to use spaces in your Branch names, surround them with quotes:
forest branch "my branch" --origin production.Checking your branch information
The interface shows at all times what is your current Branch and how many layout changes were made on it. These information appear in the top banner of your back-office.To switch your current branch to another existing branch, use the
forest switch command.Deploying your changes
The development workflow: branch → push to remote → deploy to production
Applying your changes to production: deploy
deploy means applying your branch’s changes to your reference environment definitively.
As all your environments’ layouts depend on your reference environment, the
deploy command will apply the layout changes to all your project environments.Testing your changes on a remote environment: push
push means moving your Branch’s changes to a Remote Environment set as the origin of your Branch.
forest switch. If the origin of your Branch is not the Remote you want, change it with forest set-origin.
Deploying the layout of a remote environment
Once you have tested your new layout on a Remote Environment, to deploy it to Production click on “Deploy to production” in the top banner of that Environment’s layout.Making changes directly from a remote environment
Apply final touches using the Layout Editor from the Remote Environment. Any changes you make on that Remote Environment will also be deployed when you runforest deploy.